1. Brainstorming
It all starts out with an idea, whether it be a joke submitted by one of our readers or maybe just something one of us overheard at the grocery store. We also tend to get a lot of our ideas from Just Laugh's Joke Database because it's a great resource (and we're a little biased!). Once a general idea has been landed upon, we'll usually either text message or e-mail back and forth nitpicking the specifics until Scott has enough to write the actual script.
FYI - "the script" primarily includes the actual dialog for each character and a rough layout so that Lori can make the strip flow properly, but also sometimes even goes so far as to dictate specific characters for the strip, scenery, etc...
 2. Drawing & Inking
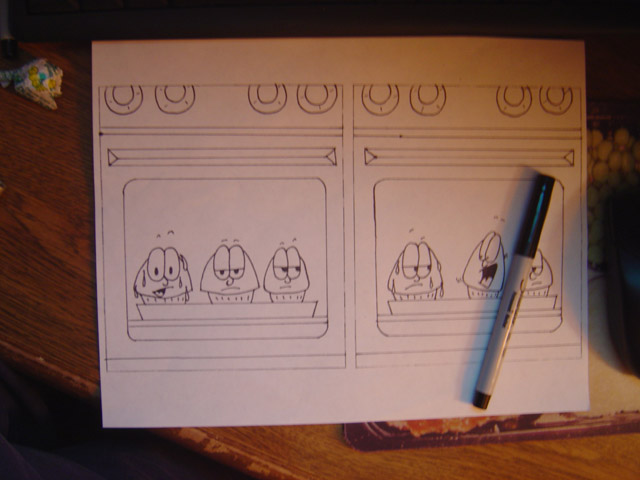
After the nitty-gritty has been duked out, Scott goes off to watch Surface while Lori sits down and draws the strip itself. Nothing real fancy - just your standard pencil and copy paper are used because we figured it'd be easiest to choose materials that are freely available everywhere.
Once the panels themselves are drawn, she goes back over all of the lines with a black Sharpie permanent marker so that the lines will show up better when scanned into the computer. We've found that the fine-tip Sharpies tend to work the best, as it's more difficult to get the detail we need out of most standard width markers. Upon completion, the entire thing is scanned into Adobe Photoshop at 300dpi (creating a massive 5-6MB file) and e-mailed down to Scott for the rest of the process...
 3. Painting
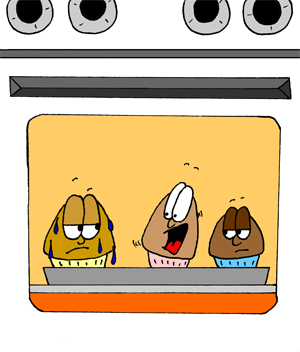
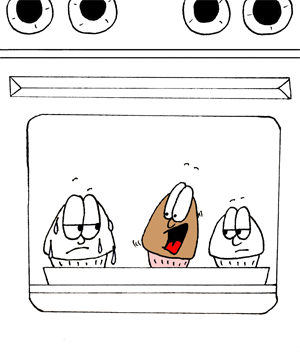
Having arrived safely in Scott's inbox, he then proceeds to cut the strip down into individual panels so that they can be worked on separately. Once again in Adobe Photoshop, he first uses a wide white brush to "delete" any blemishes from smudges, dust on the paper, etc..., then fills in the lines themselves with black. After making any minor adjustments to lines or edges that may have came out thicker than planned, it's simply a matter of applying the colors with the bucket tool.
(Mind you, this last part is still a bit easier said than done - this is where we encounter what colors work together and what ones don't, and also end up dealing with continuity issues from strips past ... often older comics will be referenced to ensure that the appropriate hair, fabric, interior building colors, etc... are used each week.)
 4. Dialog & Layout
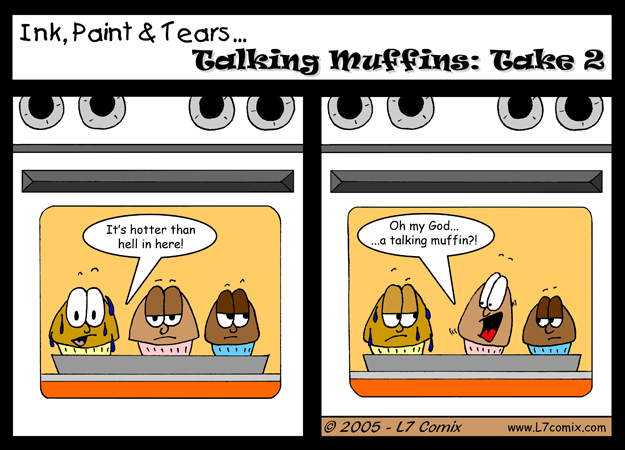
Now that the hard part's done, all that's left is to add the speech bubbles and come up with a catchy title. First the text straight from the script is added to the panels (using the font Comic Sans MS, of course), then the bubbles themselves are created around each blurb by simply selecting an area with the elliptical marquee, adding an anchor with the lasso tool, and then (on a new layer) filling the selected area white. A nice, thick black border is added to all of the bubbles on that layer when completed, and viola! Once the title, copyright and website link have all been placed accordingly, for the most part the strip is officially done.
 5. Publishing
After saving a high resolution copy offline, all of the layers are then flattened and the smaller PNG image is created that will eventually be uploaded to L7Comix.com.
As a note, it's definitely a good idea to hold onto that high res copy, even if it means burning them onto CDs or something, because there's certainly a noticeable difference in quality if you ever want to print your strips out for sale or even just your own personal use. Our final copies end up saving out at around 3395x2444 pixels @ 300 dpi for a 5.5MB PSD file and 625x450 pixels @ 300 dpi for a 150KB PNG file. The later looks great when viewed online, but in order to have a printed image that you'll be content with, a high resolution image is a must.